


So, you've got a shed, right? Maybe it's filled with lawn tools, a riding mower, or a snow blower. But getting those heavy items in and out can be a real pain. That's where a shed ramp comes in handy! A shed ramp is a simple yet effective addition to your shed that makes loading and unloading equipment a breeze. Whether you're a homeowner looking to make your life easier or a business owner needing to access stored items quickly, building a shed ramp is a great solution. In this blog, we'll walk you through everything you need to know about how to build a shed ramp, from planning to the final touches.
1. Planning Your Shed Ramp
1.1 Determining the Purpose
Before you start building, you need to figure out why you're building the shed ramp. Are you going to use it to roll a lawn mower into the shed? Or maybe you'll be pushing a wheelbarrow filled with gardening supplies. If it's for a lawn mower, you'll need a ramp that can support the weight of the mower and has a slope that won't cause the mower to tip. For example, if you have a large riding lawn mower, you'll need a wider and more sturdy ramp compared to one for a small push mower. On the other hand, if it's mainly for walking, you can focus more on a comfortable slope and a non - slip surface.
1.2 Choosing the Right Materials
There are several materials to choose from when building a shed ramp. Wood is a popular choice as it's relatively easy to work with and can be found at most hardware stores. Treated lumber is a great option as it resists rot and decay, which is important for an outdoor structure like a shed ramp. You can also use aluminum, which is lightweight, durable, and rust - resistant. Rubber ramps are another alternative, especially if you need a ramp that provides extra traction. Each material has its pros and cons. Wood might be cheaper initially but may require more maintenance over time. Aluminum is more expensive upfront but will last longer without much upkeep. Rubber ramps are great for safety but might not be as strong as wood or aluminum for heavier loads.
1.3 Measurements and Slope
Accurate measurements are crucial when building a shed ramp. First, measure the height from the ground to the shed floor. This will determine the length and slope of your ramp. The general rule of thumb is that for every 1 inch of height, you should have 12 inches of ramp length for a comfortable slope. For example, if your shed floor is 12 inches off the ground, your ramp should be at least 144 inches (12 feet) long. You also need to consider the width of the ramp. If you're using it for a lawn mower, make sure the ramp is wide enough for the mower to fit on comfortably. A width of 36 - 48 inches is usually sufficient for most lawn mowers.
Here's a simple table to help you with slope calculations:
|
Shed Floor Height (inches) |
Minimum Ramp Length (inches) |
|
6 |
72 |
|
8 |
96 |
|
10 |
120 |
|
12 |
144 |
Now that we've got the planning out of the way, let's move on to the exciting part - building the shed ramp! In the next section, we'll walk you through the step - by - step process of turning your plans into a functional ramp.

2. Building Your Shed Ramp – Step-by-Step
Now that you’ve got a solid plan, let’s roll up our sleeves and start building that shed ramp. Follow these steps, and you’ll have a functional ramp in no time.
Step 1: Preparing the Site
First things first, clear the area where the shed ramp will go. Remove any rocks, weeds, or debris—you want a flat, clean surface. Use a shovel to level the ground as much as possible. If the soil is loose, tamp it down with a tamper tool to prevent sinking later. You can also lay a layer of gravel (about 2–3 inches) to improve drainage—this helps keep the ramp stable, especially during rain or snow. Trust us, a little prep here saves big headaches later!
Step 2: Assembling the Frame
The frame is the backbone of your shed ramp, so take your time here. Cut two pressure-treated 2x4s for the sides (these are called “stringers”). The length depends on your earlier measurements—remember that slope rule? Mark the slope on each stringer using a speed square to ensure they’re identical. Then, attach cross braces (2x4s) between the stringers every 16 inches on center. This keeps the frame strong and prevents wobbling.
Step 3: Installing Ramp Joists
Joists add extra support to the frame. Cut 2x6s to fit between the stringers, spacing them 12–16 inches apart. Screw them into place with deck screws—make sure they’re flush with the top of the stringers. These joists will hold up the decking, so don’t skimp on securing them tight. If you’re building a wider shed ramp, add a middle stringer for more strength.
Step 4: Attaching the Ledger Board
The ledger board connects the ramp to the shed, so it needs to be sturdy. Cut a 2x6 to match the width of your ramp. Use lag screws to attach it to the shed floor or frame—predrill holes first to avoid splitting the wood. Then, set the frame on the prepared site and bolt the top of the stringers to the ledger board. Double-check that the ramp is level and the slope is right before moving on.
Step 5: Installing Decking
Decking is what you’ll walk or roll on, so pick something durable. Pressure-treated 2x4s or composite boards work great. Lay them perpendicular to the joists, leaving a 1/8-inch gap between each board for water drainage. Screw them into the joists with 2.5-inch deck screws. For extra grip (especially important if you’re using the shed ramp for heavy equipment), you can add non-slip tape or router grooves into the boards.
Step 6: Finishing Touches
Almost done! Trim any overhanging boards with a saw for a clean look. If you used wood, apply a weatherproof stain or sealant to protect it from rain and sun—this extends the life of your shed ramp. You can also add metal flashing where the ramp meets the shed to prevent water from seeping in. Give everything a final check—tighten any loose screws and make sure the ramp feels solid underfoot.
3. Adding Extra Support (Optional for Heavy Loads)
If you plan to roll heavy items like ATVs, generators, or large toolboxes up your shed ramp, extra support is a must. Here’s how to beef it up:
- Add More Joists: Instead of spacing joists 16 inches apart, try 12 inches. This distributes weight better and prevents sagging.
- Use Larger Lumber: Swap 2x4 stringers for 2x6s—they can handle more weight without bending.
- Install a Support Beam: Lay a 4x4 beam under the middle of the ramp, perpendicular to the joists. Bury the ends in concrete for stability—this acts like a “leg” to hold up the center.
- Attach Metal Brackets: Metal joist hangers and angle brackets reinforce connections between the frame and the shed, making the whole structure sturdier.
For example, if you’re regularly moving a 1,000-pound riding mower, these tweaks can make a huge difference. A ramp without extra support might start to warp over time, but with these additions, it’ll stay strong for years.
Ready to explore other ways to get a shed ramp? Next, we’ll talk about alternative options like concrete, aluminum, and rubber ramps—perfect if building from scratch isn’t your thing!

4. Alternative Shed Ramp Options
If building a wooden shed ramp from scratch doesn’t appeal to you, there are several other practical options to consider, each with its own set of advantages.
Concrete ramps are a top choice for those seeking a permanent and heavy-duty solution. They can easily handle the weight of large equipment, making them ideal for storage shed ramps that need to support tractors or bulky tools. To install one, you’ll frame the area with wood, pour the concrete, and smooth it out. However, they do require patience as the concrete needs 7–10 days to cure properly, and once in place, they can’t be moved. But their durability and low long-term maintenance make them a solid investment.
Aluminum ramps are perfect for those who value portability and ease of use. These lightweight structures are rust-resistant, ensuring they hold up well in various weather conditions, which is a big plus for any shed ramp. Most come in sections that can be bolted together, and some even fold for convenient storage when not in use. They work great for moving smaller items like lawn mowers or wheelbarrows, though they might not be the best fit for extremely heavy loads compared to concrete or thick wood.
Rubber ramps offer a flexible and safe alternative. They can be laid over uneven ground without much hassle, and their non-slip surface provides extra security, especially in wet weather. They’re lightweight, making setup a breeze, and are a good option for occasional use with smaller storage shed items. The main thing to watch out for is sharp objects, as they can tear the rubber, but overall, they’re a convenient choice.
5. Cost Breakdown (Estimated)
Knowing the approximate costs of different shed ramp options helps with budgeting.
Building a wooden shed ramp yourself is affordable. Pressure-treated lumber for the frame and decking costs 50to100, depending on size. Hardware like deck screws, lag screws, and metal brackets adds 10to20. If you need to rent tools such as a saw or drill, that’s 30to50 a day. Total for a basic wooden shed ramp is about 90to170.
Concrete ramps are durable but cost a bit more. Concrete mix, framing wood, and rebar for strength range from 80to150. Renting a concrete mixer and trowel adds 40to60, making the total for a concrete shed ramp roughly 120to210.
Aluminum shed ramp kits are pre-made for convenience, costing 150to300. Price depends on length and weight capacity—heavier-duty ones are more expensive. Kits include all parts, so no extra tool rentals are needed, making total cost easy to figure.
Rubber ramps are budget-friendly. Pre-made small ones start at around 80.Larger,sturdier rubber ramps can go up to 200, but they’re ready to use right away, saving setup time.
These are estimated costs. They can change based on your location and the shed ramp size you need, but they’re a good starting point for comparisons.
6. Buying vs. Building
Deciding whether to buy a shed ramp or build one depends on your skills, time, and needs. Let’s weigh the pros and cons to help you choose.
Building a shed ramp gives you more control over the design. You can customize the size, slope, and materials to fit your specific shed and the items you’ll be moving. It’s often cheaper, especially if you already have tools—you can save money by using lumber you might have on hand or picking budget-friendly materials. Plus, there’s a sense of accomplishment in creating something with your own hands. But it does take time—you’ll need to plan, measure, and put in the work, which might not be ideal if you’re short on hours or don’t feel confident with basic construction.
Buying a shed ramp, like a pre-made aluminum or rubber model, is all about convenience. Most kits come ready to assemble or even pre-built, so you can have a functional ramp in an afternoon. They’re great if you don’t want to mess with cutting wood or mixing concrete, and many are designed to be durable right out of the box. The downside is that you’re limited to the sizes and styles available, which might not be a perfect fit for your shed. They can also be more expensive upfront, especially for heavy-duty options like a high-quality aluminum shed ramp kit.
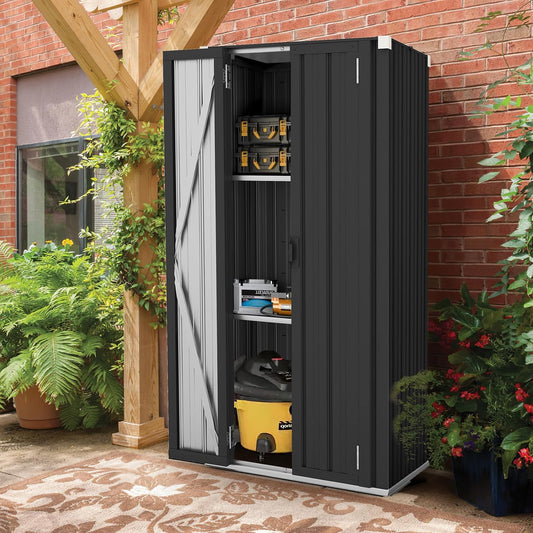
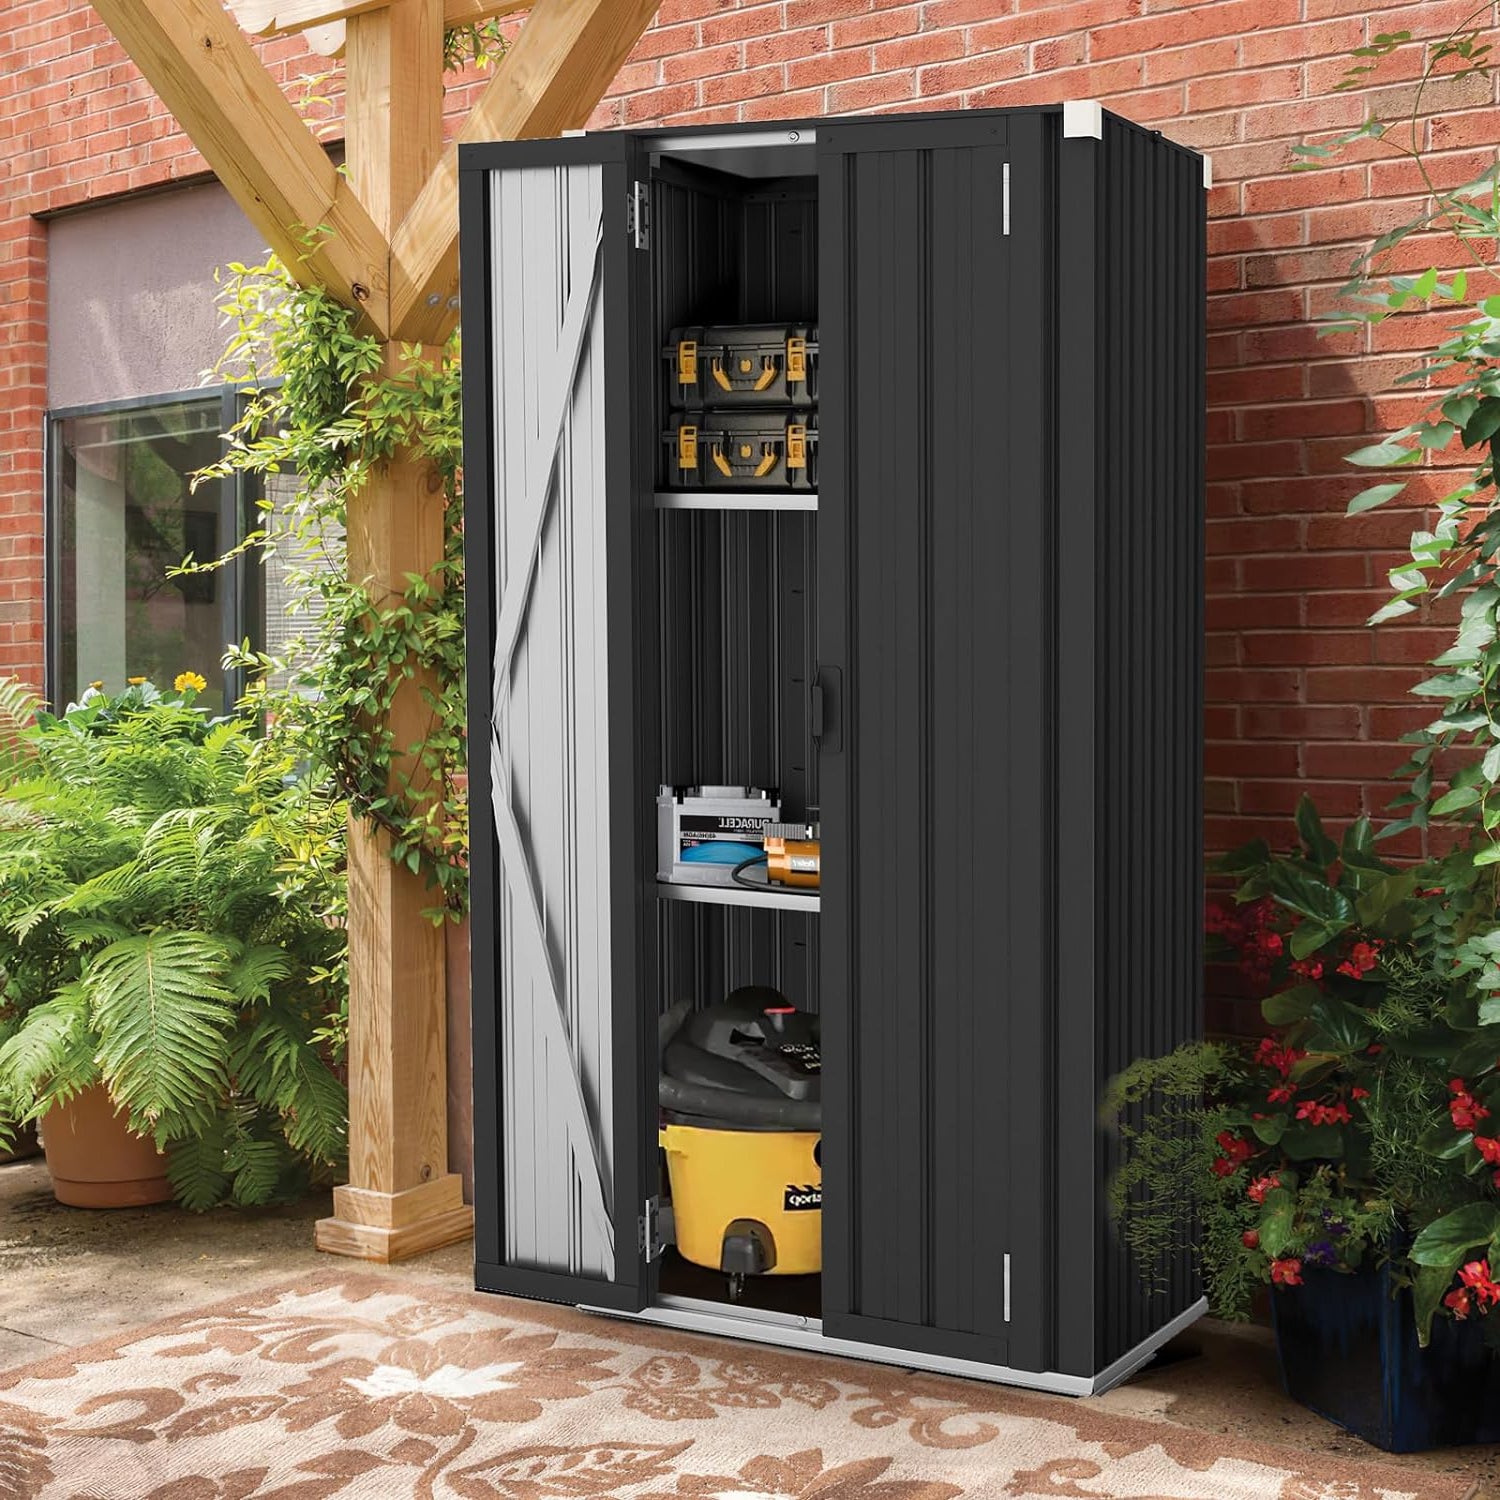
If you’re handy, have the time, and want a custom solution, building a shed ramp is probably the way to go. But if you prioritize speed and ease, buying a pre-made one makes sense—either way, you’ll end up with a useful addition to your shed. No matter which one you choose, I would recommend YODOLLA Storage Shed. They are very sturdy and trustworthy.

7. Maintenance Tips
No matter if you built a wooden shed ramp, installed a concrete one, or bought an aluminum or rubber model, taking care of it will make it last longer. Here are some simple tips to keep your shed ramp in good shape.
For wooden ramps, check for loose screws or nails regularly and tighten them up. Once a year, give the wood a quick look—if you see cracks or rot, replace those boards before they get worse. Applying a fresh coat of sealant or stain every 2–3 years will protect the wood from rain and sun, preventing warping or splitting. Also, sweep off leaves and debris to stop moisture from building up, which can lead to mold.
Concrete ramps are low-maintenance, but they’re not indestructible. Fill in any small cracks with concrete patcher to keep them from getting bigger. If you live in a cold area, avoid using salt to melt ice—salt can damage the concrete over time. Instead, use sand for traction. Keeping the ramp clean by hosing it down occasionally will prevent dirt from settling into pores and weakening the surface.
Aluminum ramps need a little love too. Wipe them down with a damp cloth to remove dirt and grime, which can cause scratches. Check the bolts and connections every few months—tighten any that are loose to keep the ramp stable. If you notice rust (though it’s rare with aluminum), gently scrub it off with a wire brush and apply a rust-resistant spray to protect the area.
Rubber ramps are pretty tough, but they can get dirty. Hose them off or wipe them with soap and water to keep them looking good. Avoid dragging heavy, sharp objects over them, as that can tear the rubber. If you store the ramp when not in use, keep it in a dry place to prevent mildew.
By following these tips, your shed ramp—whether it’s wooden, concrete, aluminum, or rubber—will stay strong and functional for years, making it easy to move all your shed items in and out. If you’re not comfortable building a ramp on your own, be sure to check out our recommended step-by-step video tutorial for extra guidance.